Detailed use
Subsystem
Accessing the Subsystem
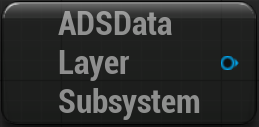
In a Blueprint, use the GetDataLayerSubsystem node directly.
Functions
Call Set World Layers State to define the complete desired Runtime state. The system first considers known Runtime Data Layers as Unloaded, then applies preset entries followed by manual overrides. A manual override therefore takes priority over the preset.
| Parameter | Detailed description |
|---|---|
Preset Table | Data Table containing the preset rows to apply. It may be empty when using only manual overrides. All of its rows are read. |
Manual Overrides | List of entries applied after the preset. Use it to temporarily change one Data Layer’s state without creating a new Data Table. |
| Name | Detailed description |
|---|---|
Set World Layers State | Applies the complete state requested by the preset and manual overrides. If neither a preset nor an override is provided, the function changes nothing. |
Get World Layers State | Returns a snapshot of the current state of all known Runtime Data Layers in the current world, sorted by name. |
Get Data Layer State | Returns a Data Layer Asset’s current Runtime state. Returns Unloaded when the reference is empty, when the world has no Data Layer manager, or when the asset is absent from the world. |
Event Dispatchers
| Name | Detailed description |
|---|---|
On World Layer State Changed | Triggered after a state is applied. It provides the previous and new states as ADS World Layer State so your Blueprint can react to the change. |
Presets
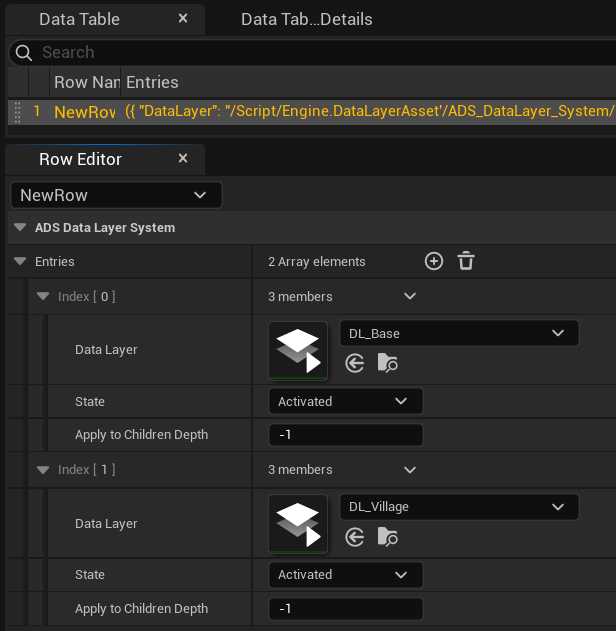
Create a Data Table using the ADS World Layer State Preset Row structure. Each row contains a list of entries that define the final state of targeted Data Layers. In the demo, DT_PresetBase and DT_PresetVillage illustrate two world configurations.
| Name | Detailed description |
|---|---|
Data Layer | Reference to the target Data Layer Asset. It must match an instance present in the world to be applied there. |
State | Requested state: Unloaded, Loaded, or Activated. |
Apply To Children Depth | Defines propagation through Data Layer children. 0 changes only the target, 1 includes direct children, and -1 includes all descendants. |
The same Data Layer must appear only once across a preset table’s rows. On a duplicate, only the first entry is retained and a warning is written to the log.
Custom window
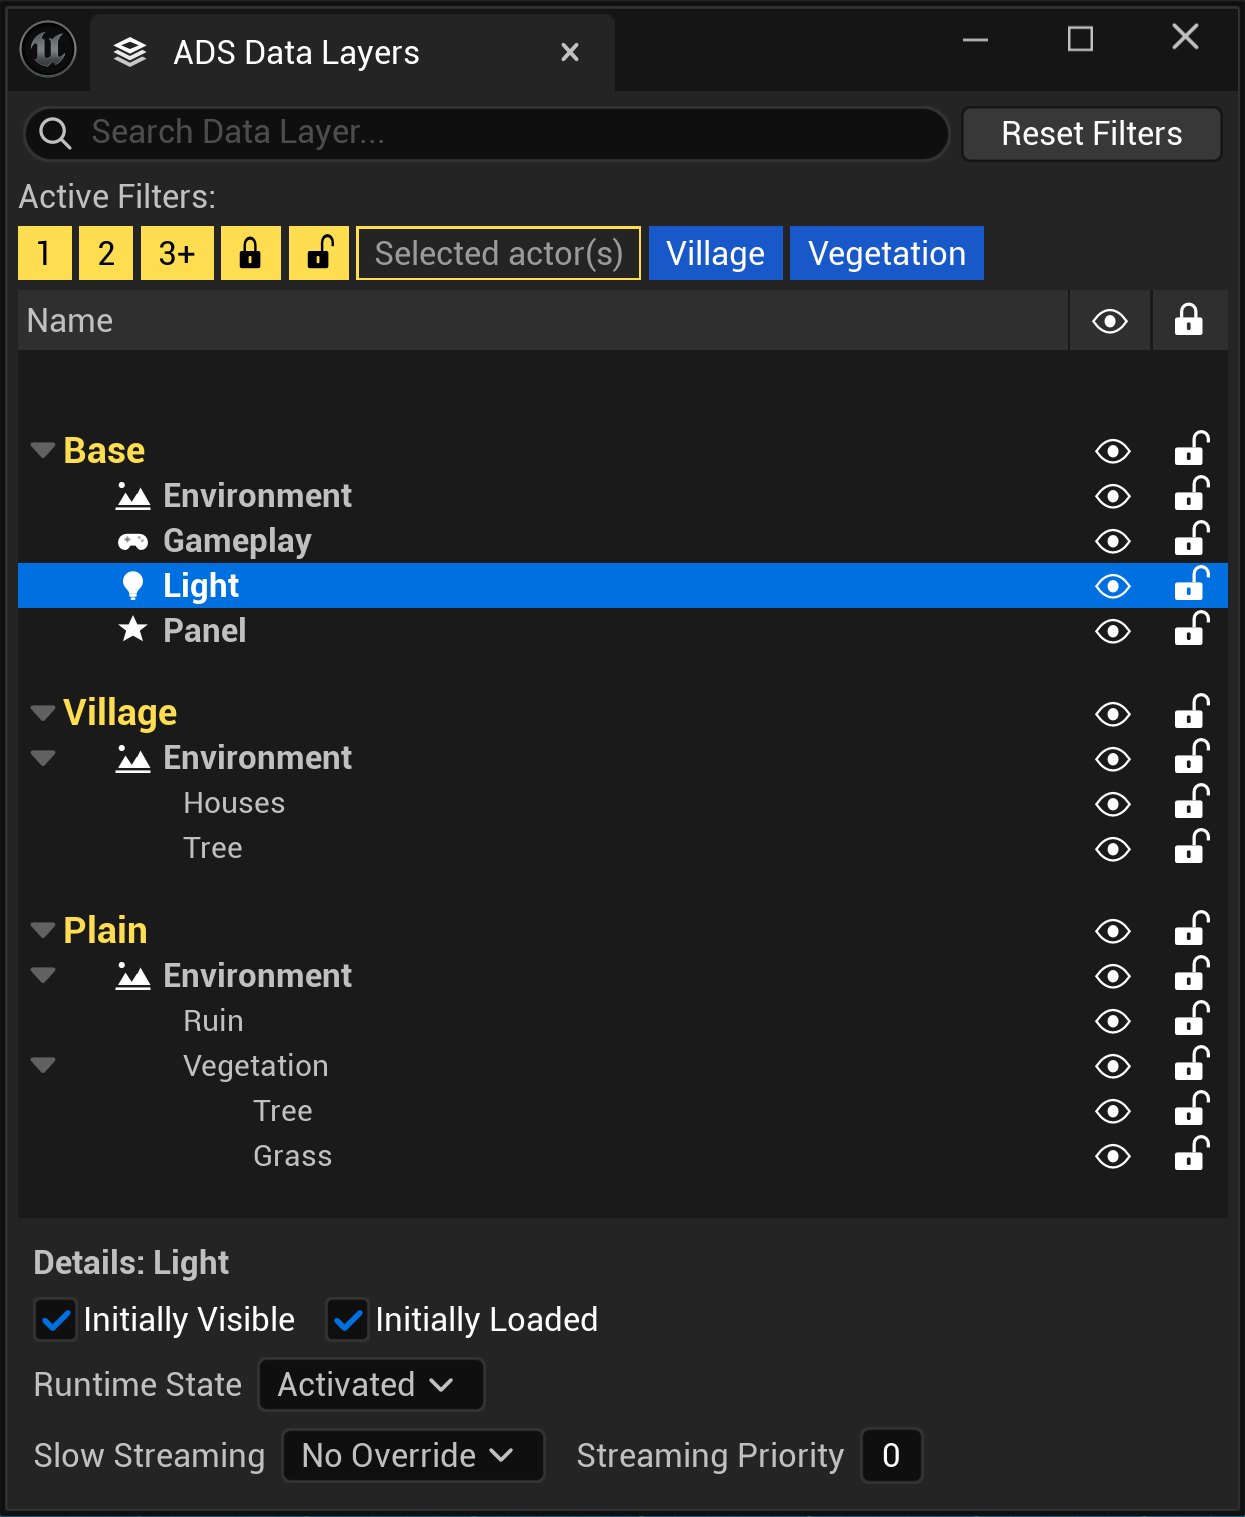
The ADS Data Layers window is an organization tool for the open level’s Data Layers. It complements Unreal Engine’s native tools with a clearer hierarchy, quick actions, and visual settings retained in the project settings.
Search and hierarchy
The Search Data Layer field filters the list by name. The view retains the parent-child Data Layer hierarchy; arrows collapse or expand groups. Top-level Data Layers are highlighted, and a Data Layer containing a selected actor is indicated in the list.
You can reorganize Data Layers with drag and drop: dropping in the center of a row creates or changes the parent-child relationship; dropping above or below changes the order among items at the same level. Move to Level 1 in the context menu removes the selected Data Layer’s parent and returns it to the root.
Yellow filters
Yellow filters are supplied by the plugin. They define the default visible set: at startup, 1, 2, 3+, locked, and unlocked are enabled, while Selected actor(s) is disabled. Click a chip to enable or disable it.
Level filters are cumulative and represent a maximum depth, not isolated levels. Enabling 2 also enables 1; enabling 3+ also enables 1 and 2. Conversely, disabling 1 disables 2 and 3+, and disabling 2 disables 3+. This ensures that required parent levels remain visible whenever deeper levels are visible.
| Filter | Detailed description |
|---|---|
1, 2, 3+ | Shows up to the first level, up to the second level, and up to the third level plus every lower level respectively. The deepest active level determines the maximum displayed depth. |
| Closed lock | Includes locked Data Layers. |
| Open lock | Includes unlocked Data Layers. |
Selected actor(s) | Restricts the display to Data Layers containing actors currently selected in the level. Their parents remain in the list to provide hierarchy context. |
The two lock filters work as a union: when both are active, locked and unlocked Data Layers are visible. Disabling one hides only its matching status. The panel prevents both from being disabled at the same time so at least one status remains displayed.
When Selected actor(s) is active, it becomes the main filter: only Data Layers containing selected actors are retained, together with their context parents. Level filters and blue filters do not narrow this result; locked/unlocked filters still apply.
Blue filters
Blue filters are user filters based on the display name, such as Village or Vegetation in the screenshot. Right-click one or more Data Layers, then choose Add as Filter to create them. They are saved in the editor user settings.
A user filter recognizes the display name and native Data Layer name, case-insensitively. Several active blue filters combine as a union: a Data Layer matching any one of them is included. This match is an explicit inclusion: outside Selected actor(s) mode, it overrides yellow level and lock filters. Conversely, if a matching blue filter is disabled, the matching Data Layer is explicitly hidden.
Blue filters therefore do not form an intersection that removes every other Data Layer: a Data Layer matching no blue filter continues to be evaluated by yellow filters. Parents required by the hierarchy remain visible when a child is retained.
Search Data Layer is applied before filters: a Data Layer must match the text in its display or native name to be retained itself. Parents of a result are still displayed as context. Reset Filters removes blue filters and restores default yellow filters: 1, 2, 3+, locked, and unlocked enabled; Selected actor(s) disabled.
Show, hide, lock, and unlock
The columns on the right of the list give direct access to each Data Layer’s state.
| Control | Detailed description |
|---|---|
| Eye icon | Shows or hides the Data Layer in the editor. |
| Lock icon | Locks or unlocks the Data Layer. A locked Data Layer protects its actors from unintended editor changes. |
The details panel at the bottom of the window also lets you edit initial visibility, initial editor loading, initial Runtime state, Slow Streaming, and the selected Data Layer’s Streaming Priority.
Display name, icons, and indentation
Right-click a Data Layer to open customization actions. Renaming changes only its display name in this window and does not rename the Data Layer Asset. For example, DL_Light can be displayed as Light.
| Action | Detailed description |
|---|---|
Rename Data Layer | Sets the selected Data Layer’s display name without changing its asset. |
Set Data Layer Icon | Selects an SVG icon supplied in Resources/Panel for the selected Data Layer or Data Layers. |
| Apply icon to existing Data Layers | The option in the icon picker applies the icon to all Data Layers already present with the same display name. |
| Automatic icon for future Data Layers | The selected icon is saved by display name. A future Data Layer with that same display name therefore receives the icon automatically. |
Remove Icon | Removes the custom icon from selected Data Layers. |
Indent right / Indent left | Adds or removes one visual indentation step without changing the real Data Layer hierarchy. |
The context menu also gives access to useful native actions: browse to the asset, select or focus associated actors, add selected actors to a Data Layer, remove a Data Layer from the panel, and manage its organization.
The custom window does not replace Unreal Engine’s native Data Layer configuration. Always verify that Data Layers intended for the game are configured as Runtime.